
Introduction
PowerAutomate is a powerful tool for creating custom automatizations for connecting to various data sources, including SharePoint. SharePoint termstore is a service that provides a centralized and consistent way to manage terms, labels, and synonyms across SharePoint sites and apps. However, PowerAutomate has no default connector to create termsets.
In this blog post, I will show you how to overcome this challenge by using a real example from one of my customers, who asked me how to create a termset with the following structure:
- Uniek number, not available for tagging, child term name, with the unique number as synonym.
This termset is intended to store a large number of items (+ 50 000) with unique identifiers and names, and to allow users to search and tag items by either the identifier or the name. For example, the termset could look like this:
- 123456, not available for tagging
- Name: Product A, synonyms: 123456
- 789012, not available for tagging
- Name: Product B, synonyms: 789012
- … and so on
I will explain how to use Power Automate to create a workflow that can create this termset from a data source in PowerApps, using the SharePoint termstore API. I will also share some tips and best practices for optimizing the performance and reliability of the workflow.
Prerequisites
Before you start, you will need the following:
- A SharePoint admin account.
- A data source in PowerApps that contains the items you want to include in the termset. The data source should have two columns: one for the unique number and one for the name. For example, you could use an Excel file, a SharePoint list, or a SQL table as your data source.
- A Power Automate account and a connection to the SharePoint site and a connection to the data source.
- A basic understanding of how to use Power Automate, and how to work with the SharePoint termstore.
Step 1: Create a termset group and a termset in SharePoint
The first step is to create a termset group and a termset in SharePoint, where you will store the items from your data source. You can do this manually in the SharePoint termstore management tool, I create a termset group called “Products” and a termset called “Product List”.
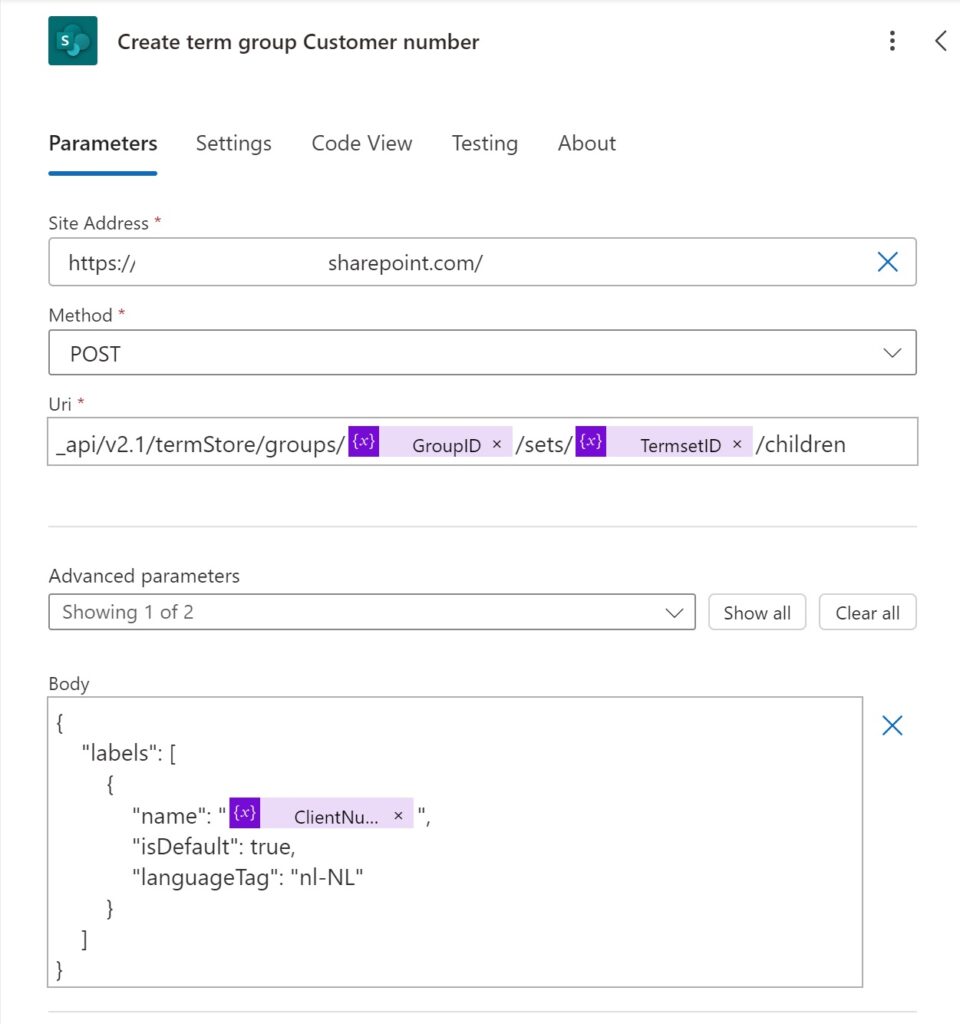
Step 2: Create terms with unique numbers and set them as unavailable for tagging
The next step is to create terms under the termset “Product List” with unique numbers that will correspond to the items in your data source. You can do this by using the following API call:
POST _api/v2.1/termStore/groups/Group-ID/sets/Termset-ID/children
In the body of the request, you need to specify the name, languageTag, and id of the term. The name should be a unique number, such as 001, 002, 003, etc. The languageTag should be the same as the one used for the termset, such as en-US. The id should be a GUID that you can generate online or with a tool.
{
    "labels": [
        {
            "name": "ProductID",
            "isDefault": true,
            "languageTag": "nl-NL"
        }
    ]
}
After creating the terms, you need to set them as unavailable for tagging, so that they will not show up in the term picker. You can do this by using the following API call:
PATCH _api/v2.1/termStore/groups/Group-Id/sets/Termset-ID/terms/Term-ID The Term-ID you can get with a compose from the previous call.
In the body of the request, you need to specify the properties object with the isAvailableForTagging property set to false. For example:
{
  "isAvailableForTagging": [
            {
                "setId": "Termset-ID",
                "isAvailable": false
            }
        ]
}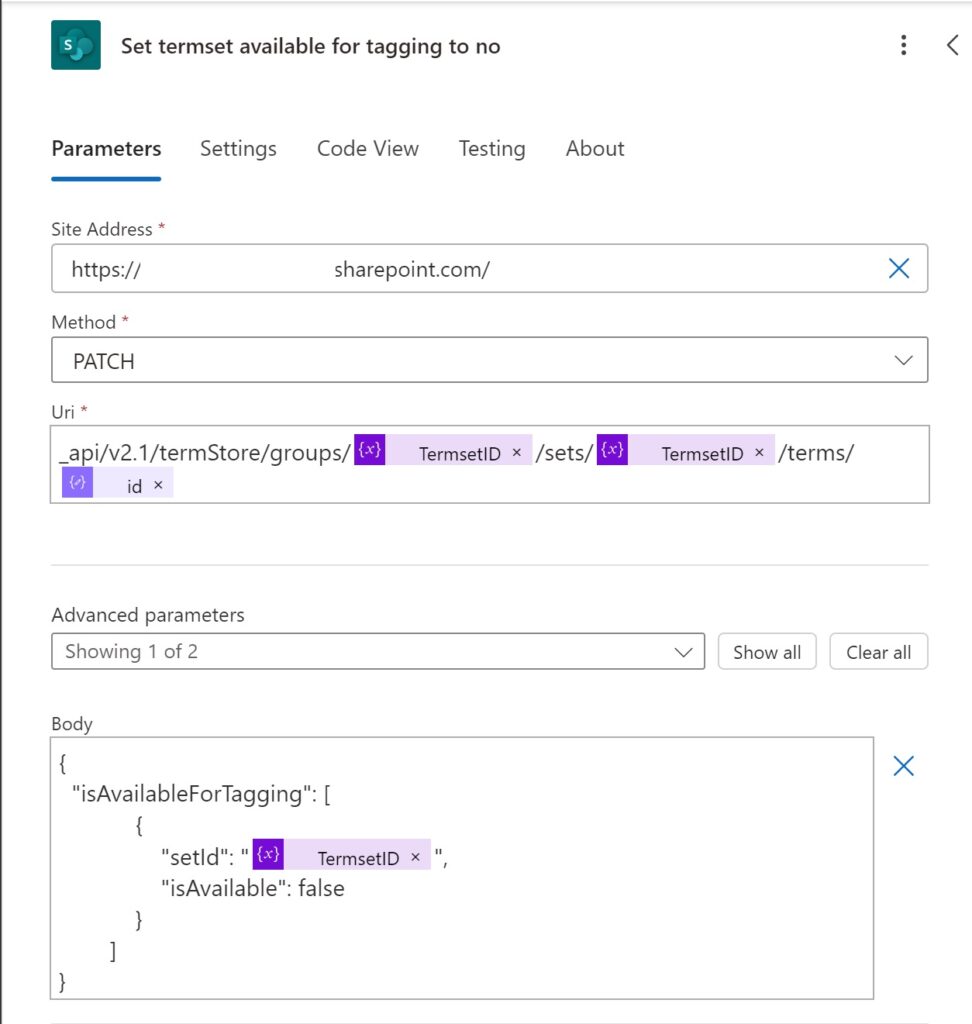
Don’t forgot to change your Method to PATCH
You need to repeat these steps for each item in your data source that you want to map to a term. For example, if you have a product list with 10 items, you need to create 10 terms with unique numbers and set them as unavailable for tagging.
Step 3: include the product name as child term and add product number as synonyms
After creating the terms, you need to add the product name and product number as synonyms for each term. This will help the search engine to match the user queries with the relevant terms. To do this, you need to use the following API call:
POST _api/v2.1/termStore/groups/Termset-ID/sets/Termset-ID/terms/Term-ID/children
This call will create a child term under the parent term with the specified ID. You need to provide the following properties in the body of the request:
{

    "labels": [

        {

            "name": "Productname",

            "isDefault": true,

            "languageTag": "nl-NL"

        },

       {

            "name": "Productnumber",

            "isDefault": false,

            "languageTag": "nl-NL"

        }

    ]

}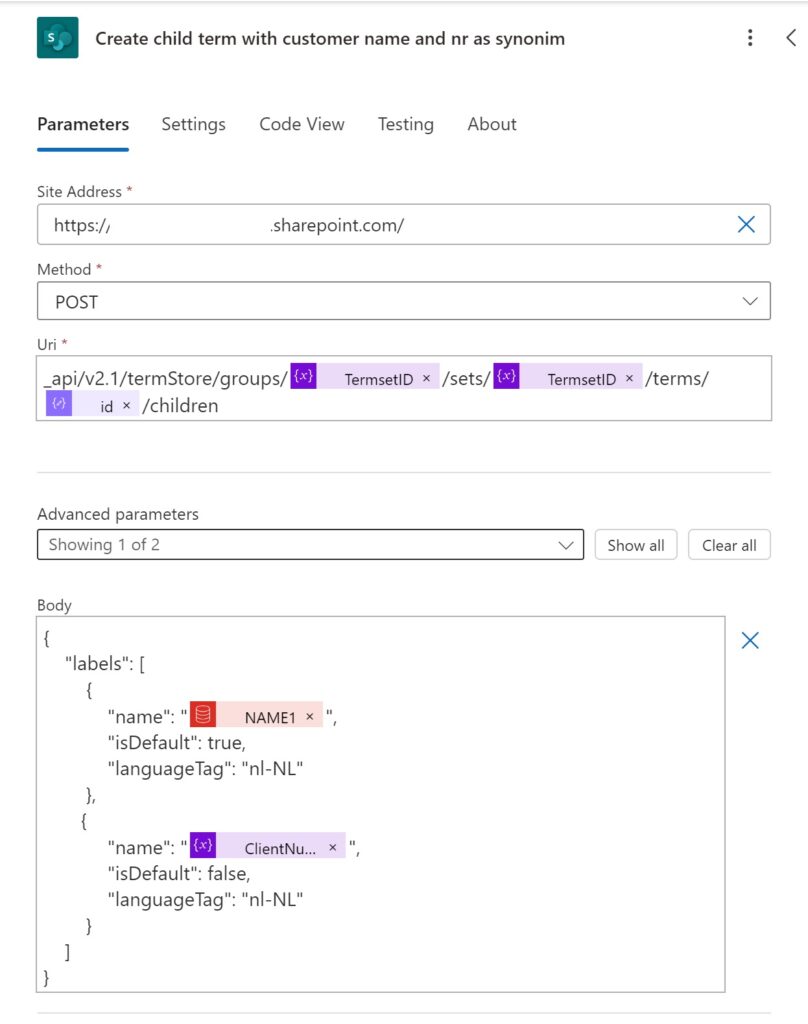
You need to repeat this process for each product name and product number that you want to map to a term. For example, if you have 10 products, you need to create 20 synonyms (one for the name and one for the number) for each term.
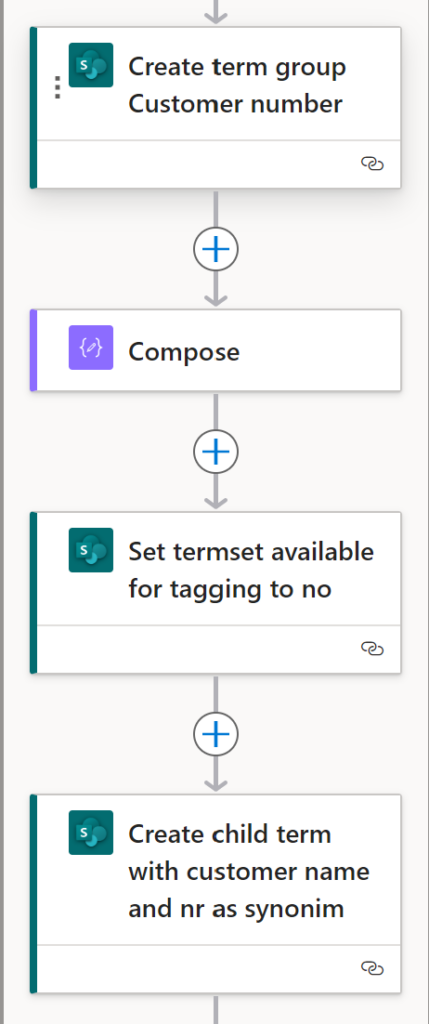
How does the Power Automate looks like
What’s next?
Now that you have learned how to map your product names and numbers to terms in the SharePoint term store, you might wonder what else you can do with this powerful feature. One possible scenario is automating your product data synchronizing with the term store using Power Automate.
My customers wanted to check SAP every night to see if any new products were available, and add them to the term store automatically. To achieve this, we used Power Automate to create a flow that would:
This way, the customer could ensure that the term store was always up to date with the latest product information from SAP, without having to update the synonyms every time manually.